
Shaker cabinets feel calm and organized, even when your kitchen is busy. The simple lines make it easy to style your space your way.
If you love that neat, timeless look, these ideas will help you pick the right details for your cabinets.
-
1. Classic White Shaker With Soft-Close Hardware
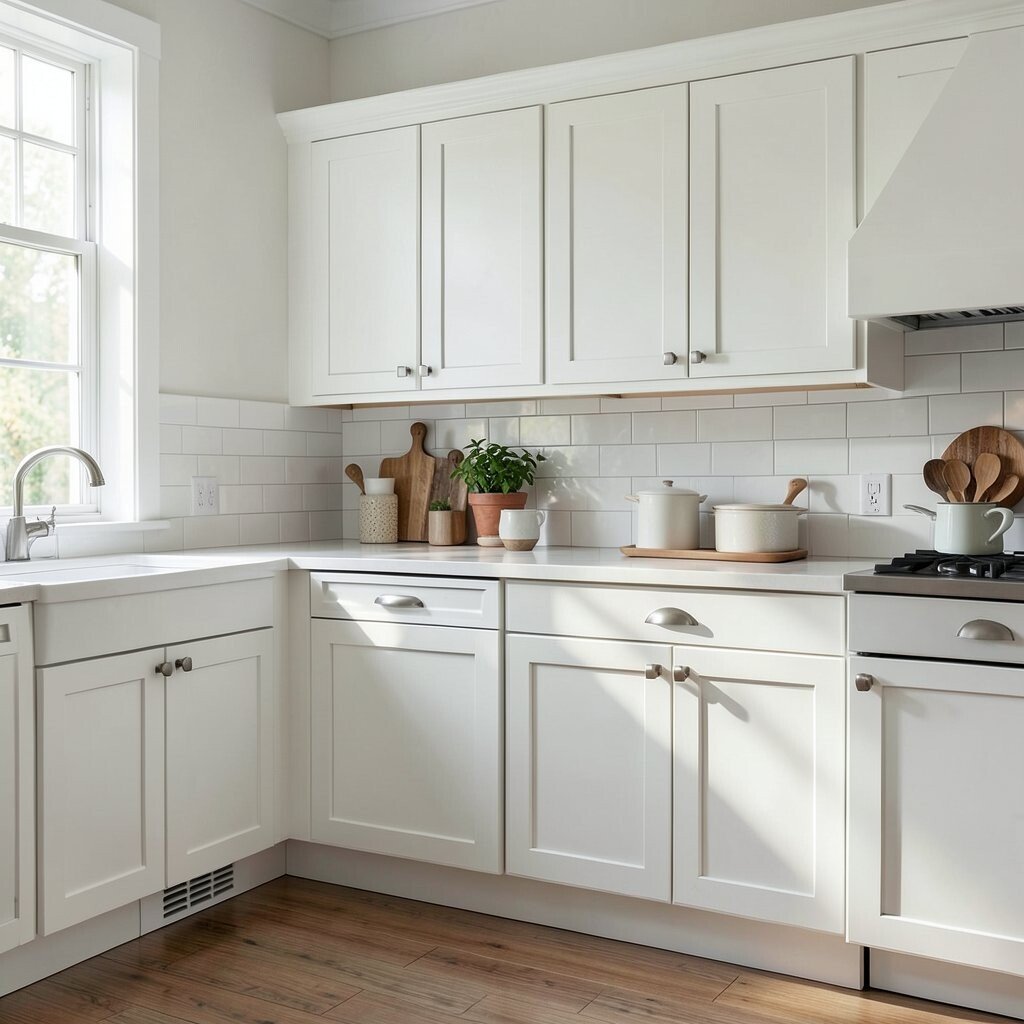
Classic White Shaker With Soft-Close Hardware Start with clean white Shaker doors and add soft-close hinges. The panels will look crisp, like fresh paint that never goes out of style.
White cabinets make the room feel brighter and more open, especially if your kitchen gets less natural light. You’ll also enjoy quieter closing, which makes daily cooking feel smoother. For a cost check, you can keep the door style the same and choose budget-friendly pulls to save money without losing the polished look.
To personalize, pick a finish that suits your home, like matte for a soft touch or satin for easy wipe-downs. Pair the doors with warm wood floors or a cozy rug so the white feels inviting. This is a great choice if you want a look that stays modern while still feeling classic.
When you shop, compare hardware styles and look for solid-feel options, even if the price is mid-range. Small upgrades can make the whole set feel custom. If you’re trying to keep costs steady, stick with a consistent white tone across upper and lower cabinets.
-
2. Two-Tone Shaker: Painted Islands, Neutral Walls

Two-Tone Shaker: Painted Islands, Neutral Walls Try two-tone cabinets by painting the island doors one shade and keeping the perimeter in another. The visual contrast makes your kitchen look designed, not just assembled.
Two-tone Shaker creates a focal point, which is helpful when you have an open layout or an island people gather around. The unique mix also hides small wear better, because scuffs show less on darker or warmer colors. For cost considerations, two-tone finishes can be done strategically by painting only the island base and maybe a few accent cabinets.
Choose one color that matches your countertop undertones, like creamy whites with quartz that has warm flecks. Then pick a second shade that supports your backsplash or wall paint. You can personalize with matching shelves near the island so you get a “built-in” look.
If you want a modern trend, consider a greige or deep sage island tone with simple brushed nickel pulls. Budget tip: pick durable cabinet paint and focus on smooth surface prep, because prep time saves rework time.
-
3. Warm Maple Shaker With Clear Satin Finish

Warm Maple Shaker With Clear Satin Finish Go for warm maple Shaker cabinets with a clear satin finish that shows the wood grain. The panels will look inviting and natural, like sunlight bouncing off honey-colored floors.
Wood-finish Shaker brings a cozy feel and works with many decorating styles, from farmhouse to modern. Natural grain patterns make every cabinet slightly different, so your kitchen feels truly one-of-a-kind. For cost, solid wood is pricier, but you can sometimes get a similar look with quality veneer and careful finishing.
To personalize, add a darker stain only on the island doors or drawer fronts, so the rest stays bright. This gives depth without overwhelming the space. If you love variety, choose pulls in bronze or dark brass so they complement the warm undertones.
A current trend is pairing lighter wood cabinets with matte black or oil-rubbed bronze hardware. This combo looks bold but still feels grounded. Keep cleaning simple by using the right topcoat so fingerprints wipe away easily.
For tips, ask your installer about moisture-resistant finishing, especially near sinks and dishwashers. That small detail helps your cabinets last longer and look better over time. With warm maple, your kitchen will feel calm and welcoming every day.
-
4. Recessed Panel Shaker With Matte Black Pulls

Recessed Panel Shaker With Matte Black Pulls Lean into the Shaker look by choosing recessed panel doors that add gentle shadows. Add matte black pulls so the outlines feel sharp and stylish.
The benefit is a clean, layered look that doesn’t feel flat. Shadows from recessed panels create visual depth, which is great for kitchens with simple countertops. If you’re watching costs, you may be able to keep door construction standard and splurge only on hardware and a quality finish.
To personalize, match the cabinet pulls with faucets, lighting, or even a matte black trash pull-out handle. This tie-in makes the whole kitchen feel coordinated. Current trend vibes often lean toward matte black because it reads modern and hides smudges better than glossy finishes.
For a smart tip, measure spacing for pulls so they line up perfectly across drawers and doors. You’ll notice the difference every time you open something. Choosing a matte finish on hardware also helps fingerprints look less obvious.
-
5. Soft-Gray Shaker With Crisp White Trim
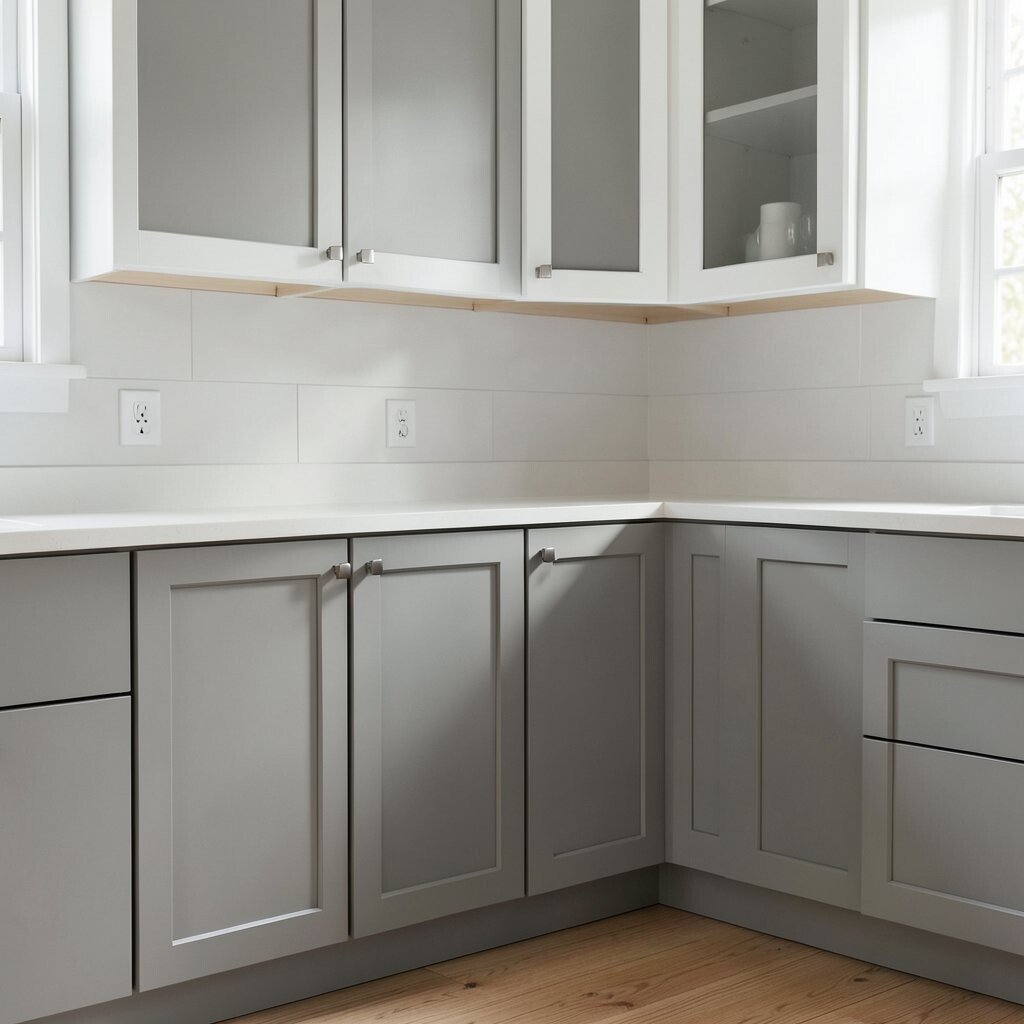
Soft-Gray Shaker With Crisp White Trim Use soft-gray Shaker cabinets with crisp white trim around the frames. The contrast makes the cabinet design pop without feeling loud.
Gray is friendly and flexible, so it pairs well with many countertops and floors. The white trim adds definition, which highlights the classic Shaker layout. For cost considerations, you can often achieve this look with a paint-and-trim approach while keeping cabinet boxes the same.
Personalize by choosing the gray based on the mood you want: cooler gray can feel sleek, while warmer gray feels cozy. Add glass-front upper cabinets to show dishes and make the room feel lighter. This small styling choice also supports a trend toward “display-friendly” cabinetry.
To keep the look cohesive, match cabinet trim color to your backsplash grout or wall paint. Budget tip: consider repainting only the visible door faces and keeping inner surfaces basic. You’ll still get the high-impact look where it matters most.
If you want extra charm, add subtle beadboard panels to a few select upper doors. That detail gives your cabinets a custom feel without changing the overall Shaker identity.
-
6. Shaker Cabinets With Under-Shelf Lighting

Shaker Cabinets With Under-Shelf Lighting Install under-shelf lighting inside the upper cabinet area or along the underside of open shelves. The light makes the Shaker panels look like they’re glowing from within.
This upgrade is a big benefit at night, because you get bright, even light for cooking. It also helps small kitchens feel larger, since shadows soften. From a cost viewpoint, lighting is usually cheaper than replacing cabinets, so it’s a smart place to spend if you want a noticeable change.
To personalize, choose warm white bulbs for a cozy vibe or a slightly cooler tone for a crisp look. You can also add dimmers, so mornings feel gentle and evenings feel relaxed. If your kitchen is trending toward “ambient layers,” lighting is the easiest way to follow that style.
Try placing lighting above glass-front cabinets so your glass and dishes look intentional. If you have a mixed finish plan, lighting will help both light and dark cabinets look balanced. Always check power access and cord routing before you commit.
-
7. Off-White Shaker With Weathered Wood Accents

Off-White Shaker With Weathered Wood Accents Choose off-white Shaker cabinets and add weathered wood accents on a few doors. The mix creates a lived-in style that feels warm and real.
This look is unique because it keeps the clean Shaker structure while adding texture through a different material. Off-white cabinets help the room stay bright, and the weathered accents add character. For cost, you can keep most cabinets simple and apply wood accent panels to a small set of upper doors or a built-in nook.
Personalize with a wood tone that matches your floor or open shelves, like barn oak or driftwood. Add a mix of baskets or glass jars in the accented cabinets to show off the texture. A current trend is blending smooth painted cabinets with tactile natural materials, so this fits right in.
Tip: keep the accent portion consistent in color and finish so it feels intentional. Too many random wood tones can look messy. If you like DIY, you could swap in pre-made wood inlays rather than building something from scratch.
When planning your budget, remember that special materials cost more, but using them only in a few spots keeps the overall project manageable. The result still looks high-end and custom.
-
8. Tall Pantry Shaker Cabinets With Matching Crown Detail
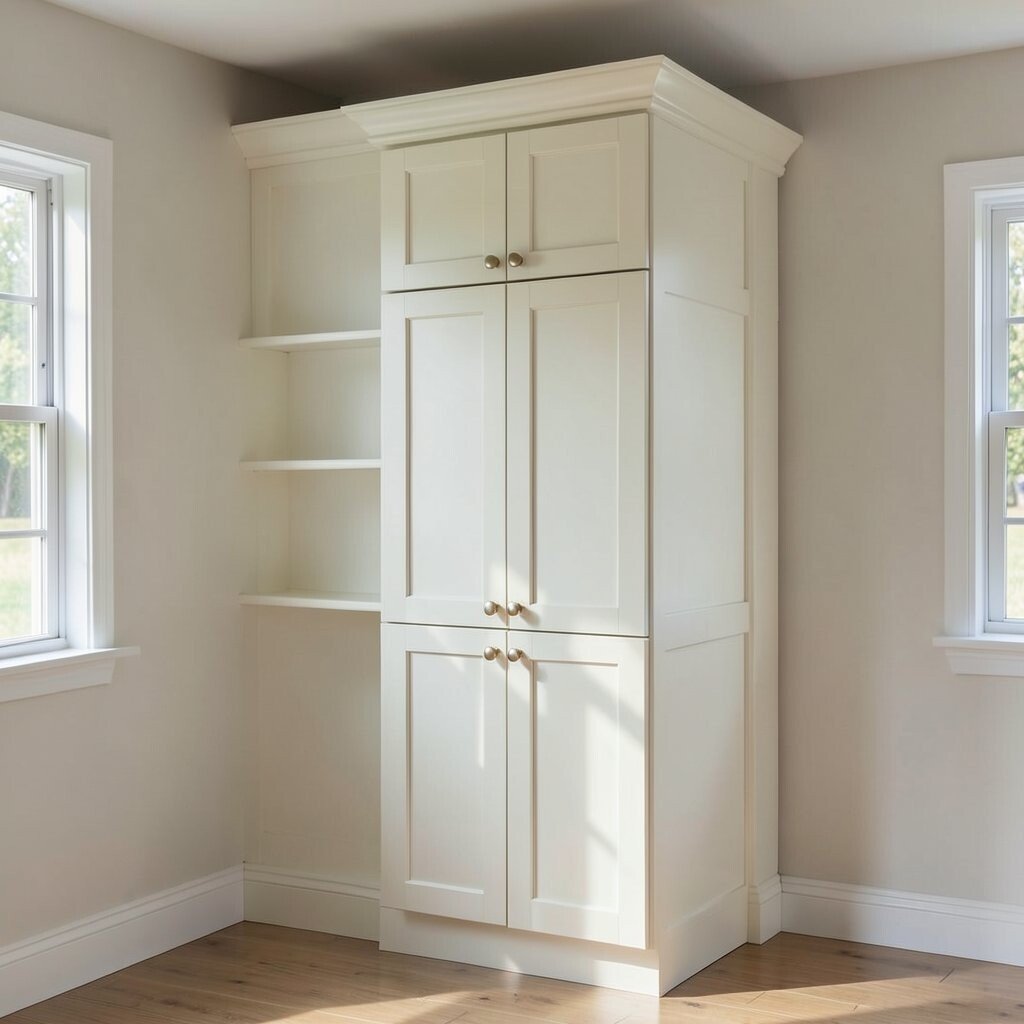
Tall Pantry Shaker Cabinets With Matching Crown Detail Build a tall pantry with Shaker doors and add matching crown molding at the top. The height and clean lines create a strong, stylish storage moment.
Tall pantry cabinets are great because they make storage feel organized instead of crowded. They also give your kitchen a “finished” look, like custom built-ins. For cost considerations, pantry construction can be a larger line item, but it often replaces multiple smaller cabinets, which can save money overall.
To personalize, include pull-out trays, adjustable shelves, and a dedicated spice shelf so your daily cooking is easier. That way, storage becomes part of your routine, not a chore. If you want a trend move, consider adding a drawer for smaller items to keep countertops clear.
Choose hardware that matches your room, like simple knobs for upper doors and sleek pulls for drawers. Then make sure the cabinet finish ties into your other shaker fronts so everything looks like one set.
-
9. Shaker Cabinets With Glass-Front Upper Doors
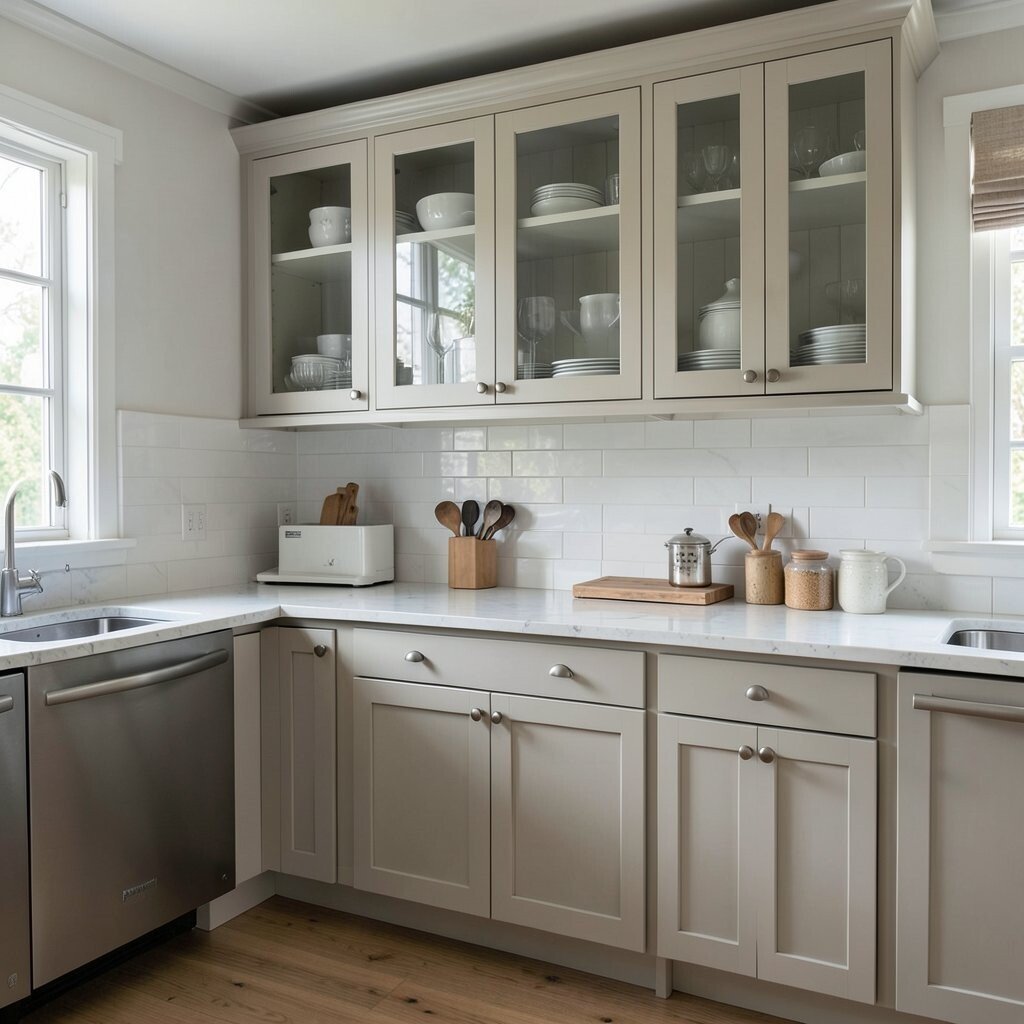
Shaker Cabinets With Glass-Front Upper Doors Swap a few upper cabinets to glass-front Shaker doors so you can display dishes or pretty jars. The panels still feel classic, but the glass adds sparkle and openness.
Glass fronts bring a benefit you can see instantly: the kitchen feels less heavy. They also help you stay organized because you can spot items right away. For cost, glass panels can raise the price, but you can limit them to just the upper row or a corner cabinet.
Personalize the glass by choosing clear, frosted, or textured options. Frosted glass hides clutter, while clear glass shows your style. This is a current trend because many kitchens are moving toward “display and function” storage, not hiding everything behind solid doors.
For tips, keep what you display tidy and color-coordinated. Matching can be simple, like using one jar style or one dish pattern. If you prefer a calmer look, pick neutral glass storage and a few accent pieces like a small wooden cutting board.
Also think about lighting, because glass + light looks extra nice. Even a small change in cabinet interior lighting can make glass-front doors feel premium.
Before you buy, confirm that glass doors meet your cleaning needs, since they can show smudges. A quick wipe routine makes it easy to keep the look fresh.
-
10. Two-Color Trim: Dark Framework With Light Cabinet Faces
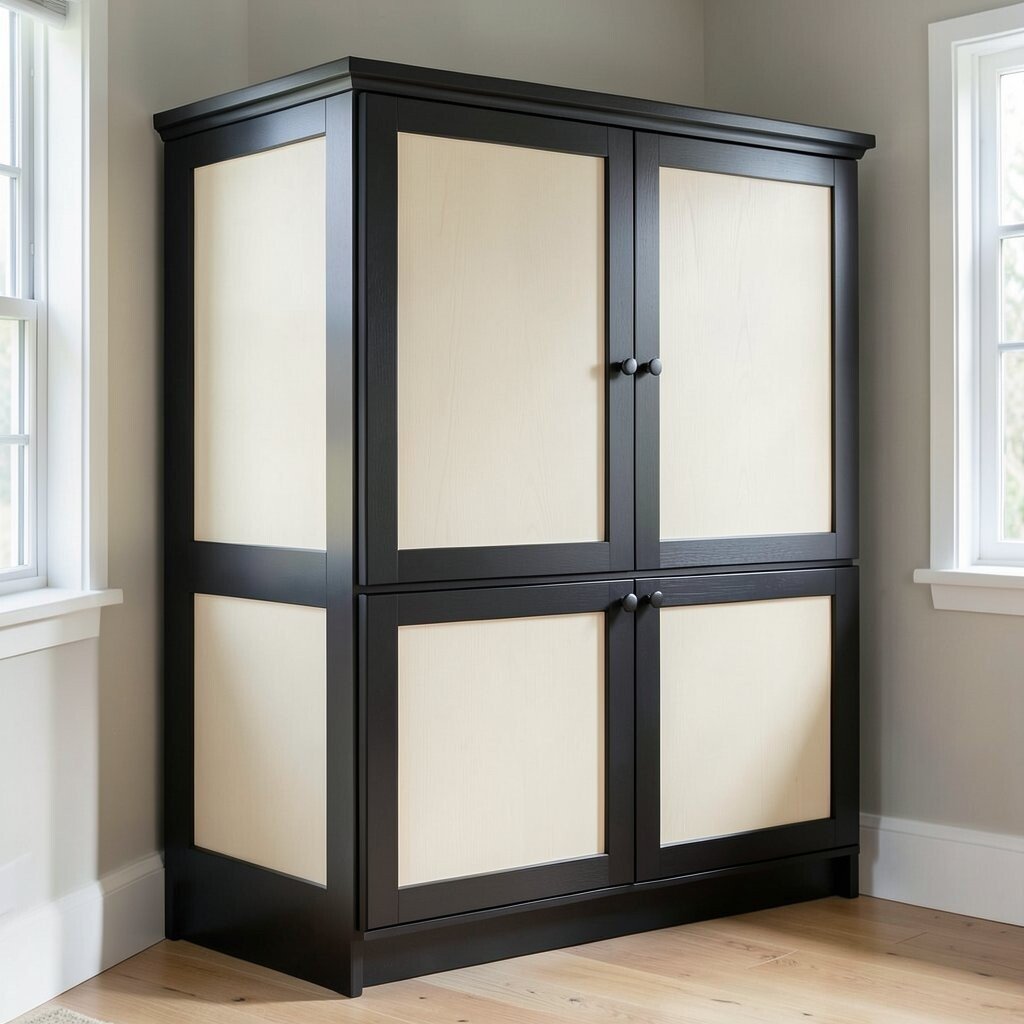
Two-Color Trim: Dark Framework With Light Cabinet Faces Create a bold look by painting the Shaker cabinet frames a darker color and keeping the door faces lighter. The result feels architectural and modern without losing the cozy Shaker style.
This idea is unique because it highlights the cabinet design lines more strongly than a single-color finish. The dark framework adds structure, so even simple countertops look more styled. For cost considerations, the extra paint work can be worth it because you’re not buying new cabinet boxes or changing the whole layout.
Personalize by matching the dark trim to your floor stain or window frames. You can also use brushed brass or matte black pulls to echo that deeper shade. A trend that’s showing up more often is “contrast trim,” which makes classic cabinetry look updated and crisp.
Tip: decide your trim shade early and test it on a small area, since cabinet lighting can change how paint looks. Use consistent sheen levels so the lines stay sharp and not overly shiny. When you budget, account for more careful painting time, because crisp edges take patience.
-
11. Shaker Cabinets With Soft Arched Pulls and Curved Details
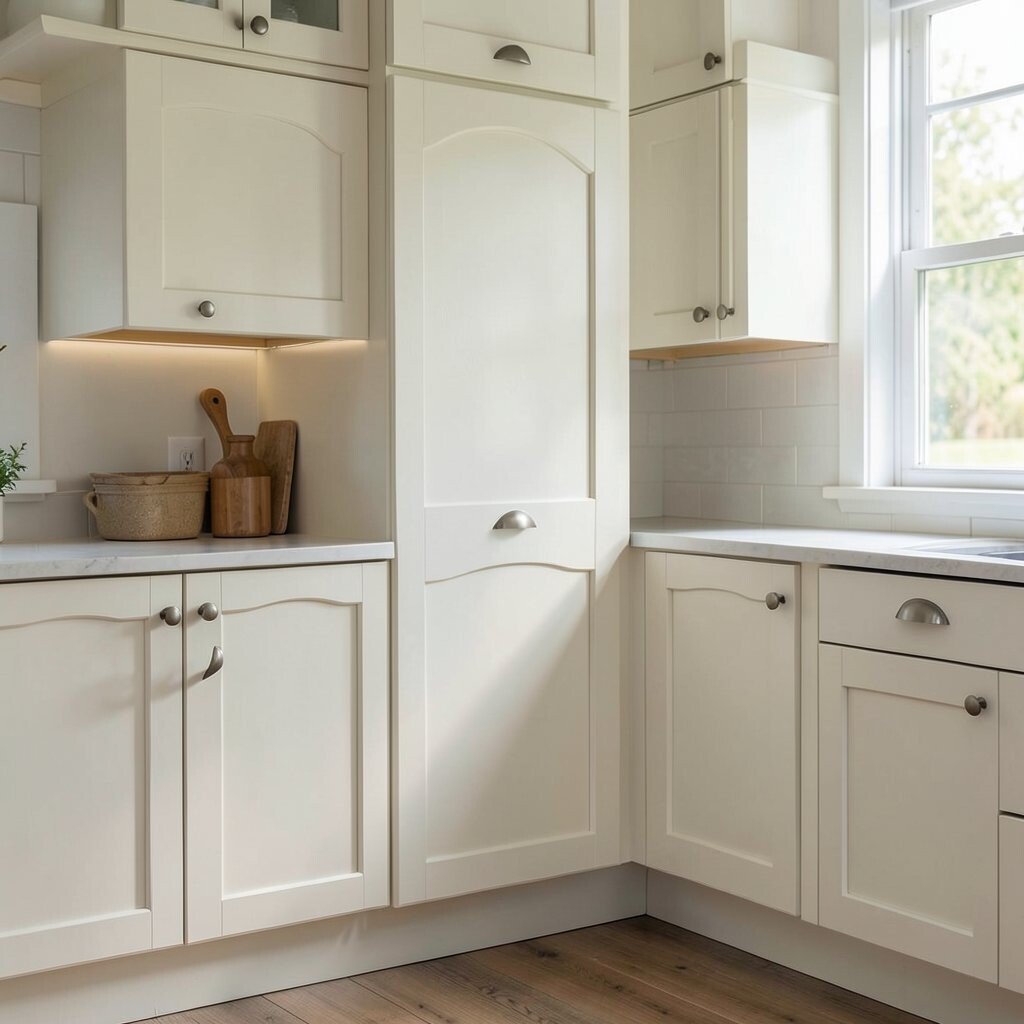
Shaker Cabinets With Soft Arched Pulls and Curved Details Keep the Shaker doors straight and simple, but add soft arched pulls that feel rounded and friendly. This tiny change makes the whole kitchen look less boxy and more welcoming.
The benefit is comfort, because curved hardware feels easy to grip and looks gentle in the room. It also makes your cabinets stand out without changing the cabinetry itself. For cost, upgrading hardware is usually one of the most affordable ways to get a fresh look, especially if your cabinet layout already fits your space.
Personalize by choosing a metal finish that matches other touches, like aged brass for warmth or brushed nickel for a clean, neutral vibe. If you want a unique twist, pick pulls with a subtle texture so they feel special. This approach fits a current style trend toward softer, more organic shapes.
Tip: measure the pull hole spacing carefully and choose hardware that fits your existing doors or update the mounting plan. When installing, use a level so the pulls align perfectly. Even if everything else is simple, good alignment makes cabinets look high-end.
If you’re on a budget, you can mix sizes: longer pulls for drawers and shorter pulls for doors. That keeps the look balanced while staying practical.
-
12. Natural Stone Look Countertops Paired With Shaker in Sage Green
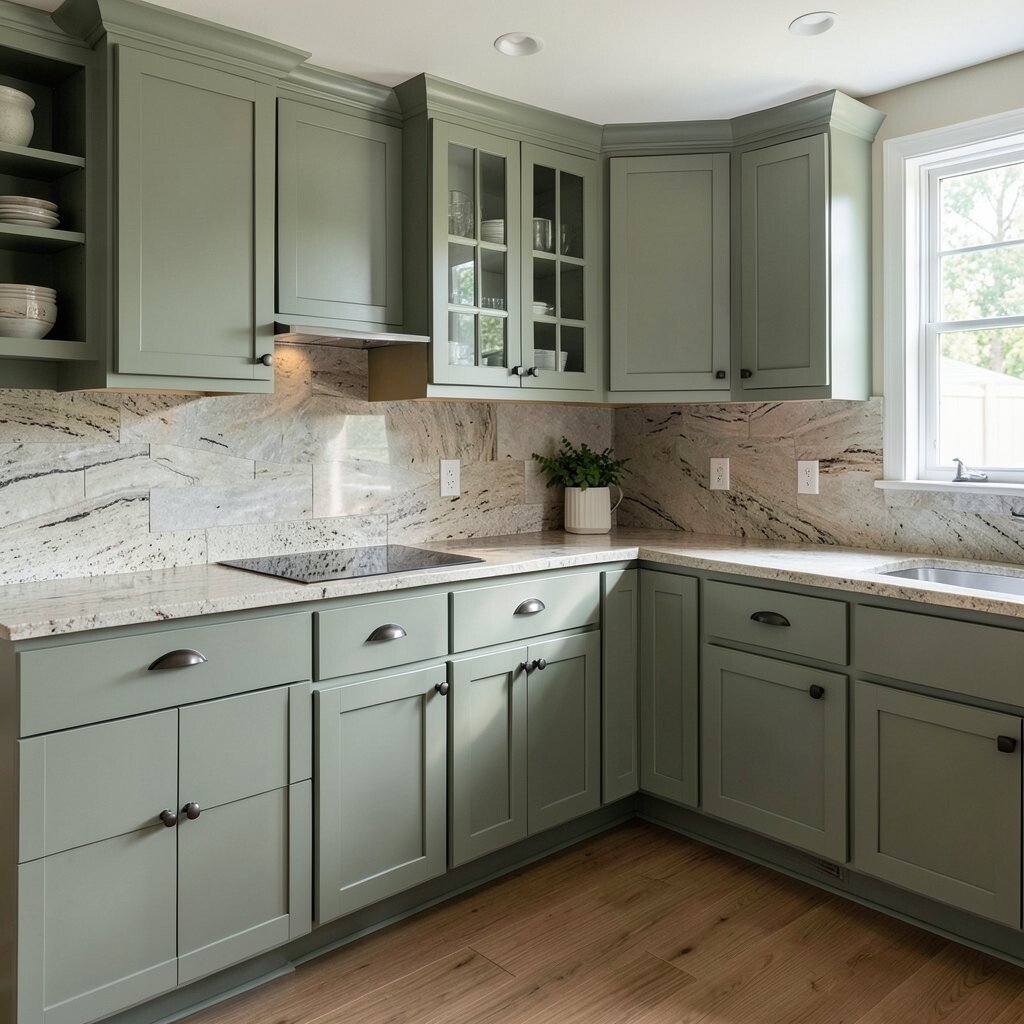
Natural Stone Look Countertops Paired With Shaker in Sage Green Pick Shaker cabinets in sage green and pair them with natural stone look countertops. The green will add calm color, and the stone gives a sturdy, luxurious feel.
Sage green is a benefit because it looks trendy but still feels timeless. It softens the kitchen, especially when your backsplash is neutral. For cost considerations, countertops can be a big part of the budget, so plan ahead and choose a stone pattern that works with many cabinet hardware finishes.
To personalize, choose a shade of sage that matches your lighting, like a muted gray-green for cooler rooms. Then add hardware in oil-rubbed bronze or dark stainless for a grounded look. This combo matches a current trend of bringing nature-inspired colors into everyday homes.
Tips: keep your backsplash simple so the cabinet color shines. If you love texture, use a matte tile or a small mosaic behind the sink. Also think about the cabinet finish, because matte sage hides tiny smudges better than glossy paint.
When planning cost, ask your contractor about paint durability, since kitchen cabinets take daily wear. A better finish costs more up front but can save money by reducing repainting later. With sage Shaker and stone look counters, your kitchen will feel fresh and calm.
-
13. Shaker Cabinets With Matching Bar-Style Backsplashes and Trim
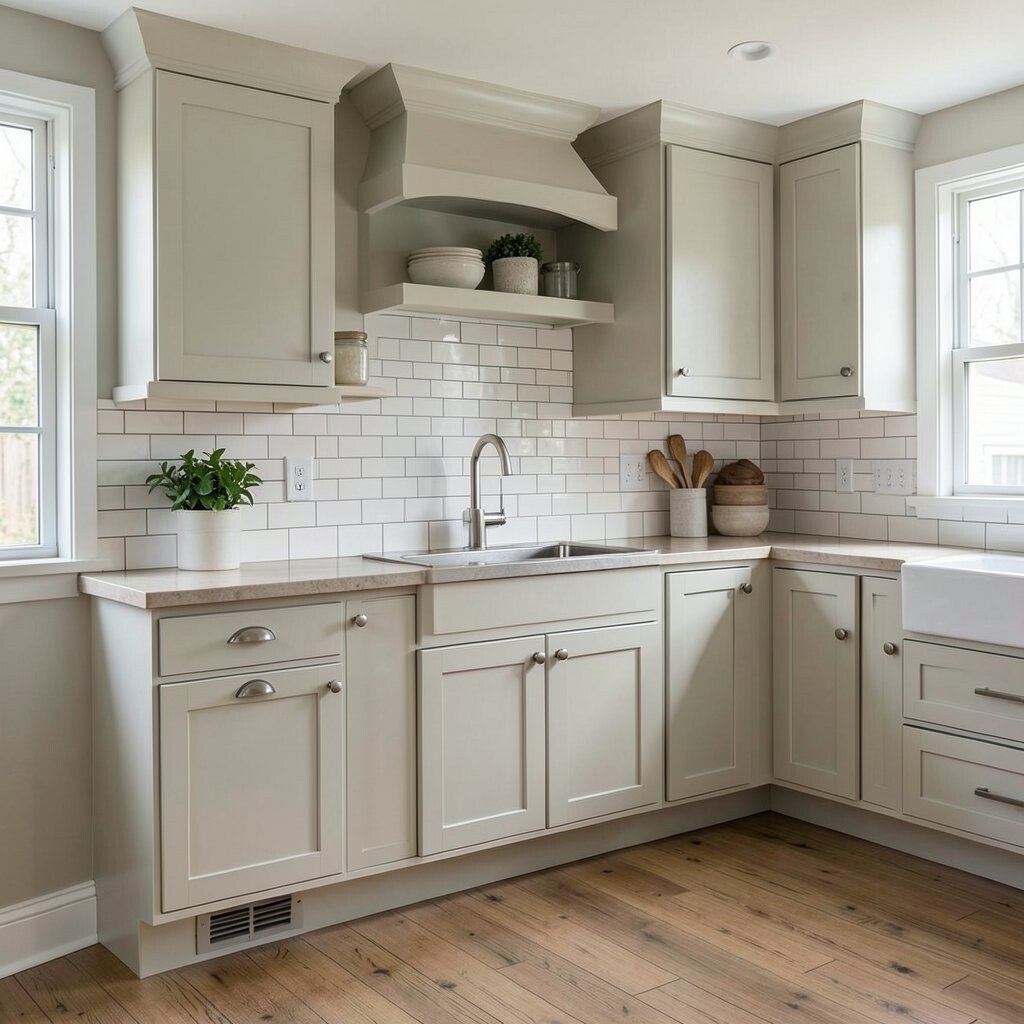
Shaker Cabinets With Matching Bar-Style Backsplashes and Trim For a cohesive, high-end look, match your Shaker cabinet style with bar-style backsplash tiles and trim. The straight panel lines and tile rhythm work together like a coordinated outfit.
The benefit is that everything looks intentionally planned, not just pieces picked separately. Matching trim details can make a kitchen feel custom, even when it’s a standard cabinet system. For cost, you can control spending by choosing a limited tile area near the main work zone and adding trim pieces that add big impact.
Personalize by selecting backsplash colors that repeat in small ways, like pulling a hint of gray from your countertop into the tile. Then choose cabinet hardware that echoes the backsplash trim, such as brushed brass accents. This is a strong current trend because people want kitchens that look styled from top to bottom.
Tip: bring a sample board when you shop so you can compare cabinet paint undertones with tile colors in real lighting. That simple step can prevent “almost right” mismatches. If you’re trying to keep costs lower, consider a subway tile look with a focused accent strip instead of full coverage.